Lux3D Website Navigation, Homepage, and Creation Space
Written By Aholo3d
Last updated About 22 hours ago
Main Entries
Homepage: Product capabilities, solutions, cases, pricing, and quick trial.
Creation Space: Enter the Lite or Pro editor.
Asset Library: Manage image, model, and material assets.
Docs / API: Developer quick start, API reference, authentication, and SDK/tools entry.
Dashboard: Plans, credits, API keys, and usage records.
Help & Feedback: In-app feedback, official user group, email, and this product manual.
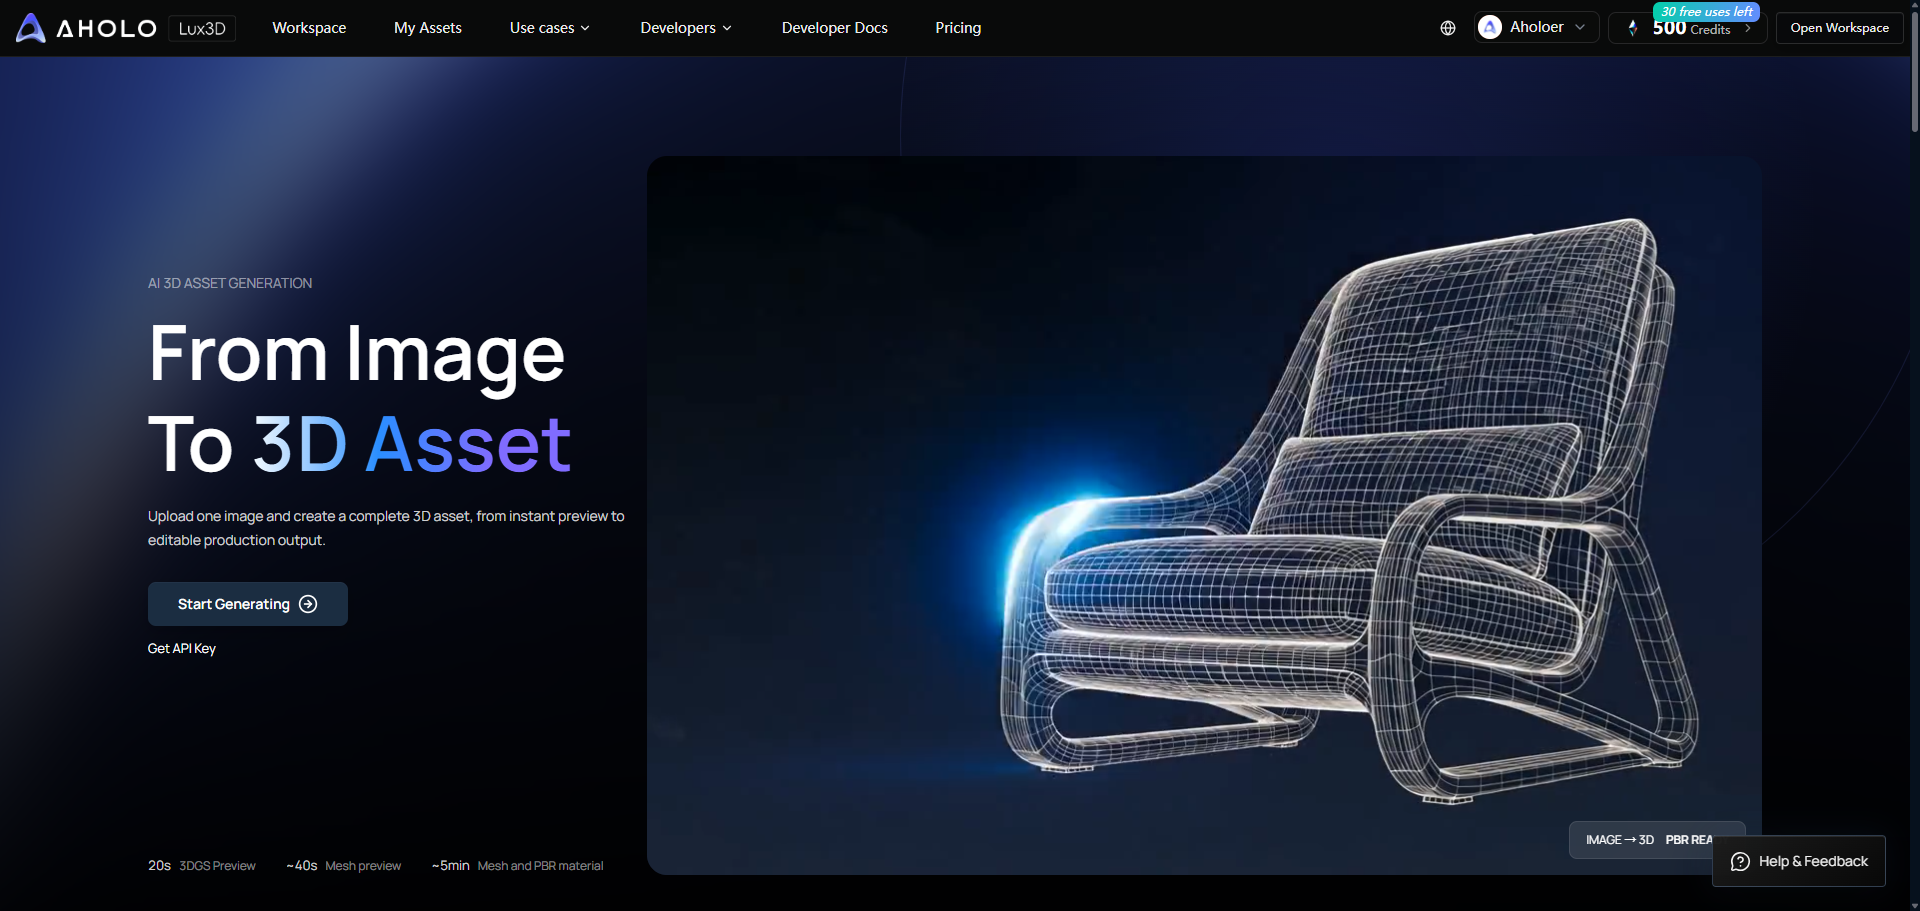
Three-Step Trial on the Homepage
Upload a PNG, JPG, or WEBP reference image.
The system analyzes the image and generates a 3D result with PBR materials.
Preview in real time, then enter the Creation Space to continue editing or export.
For reference images, we recommend a single subject, complete outline, clean background, and even lighting. Severe occlusion, overly small subjects, multiple overlapping objects, or overexposure from high reflectiveness will reduce stability.
Figure 1: Lux3D homepage and reference image upload entry
Creation Space: Lite
1. New Task and Modes
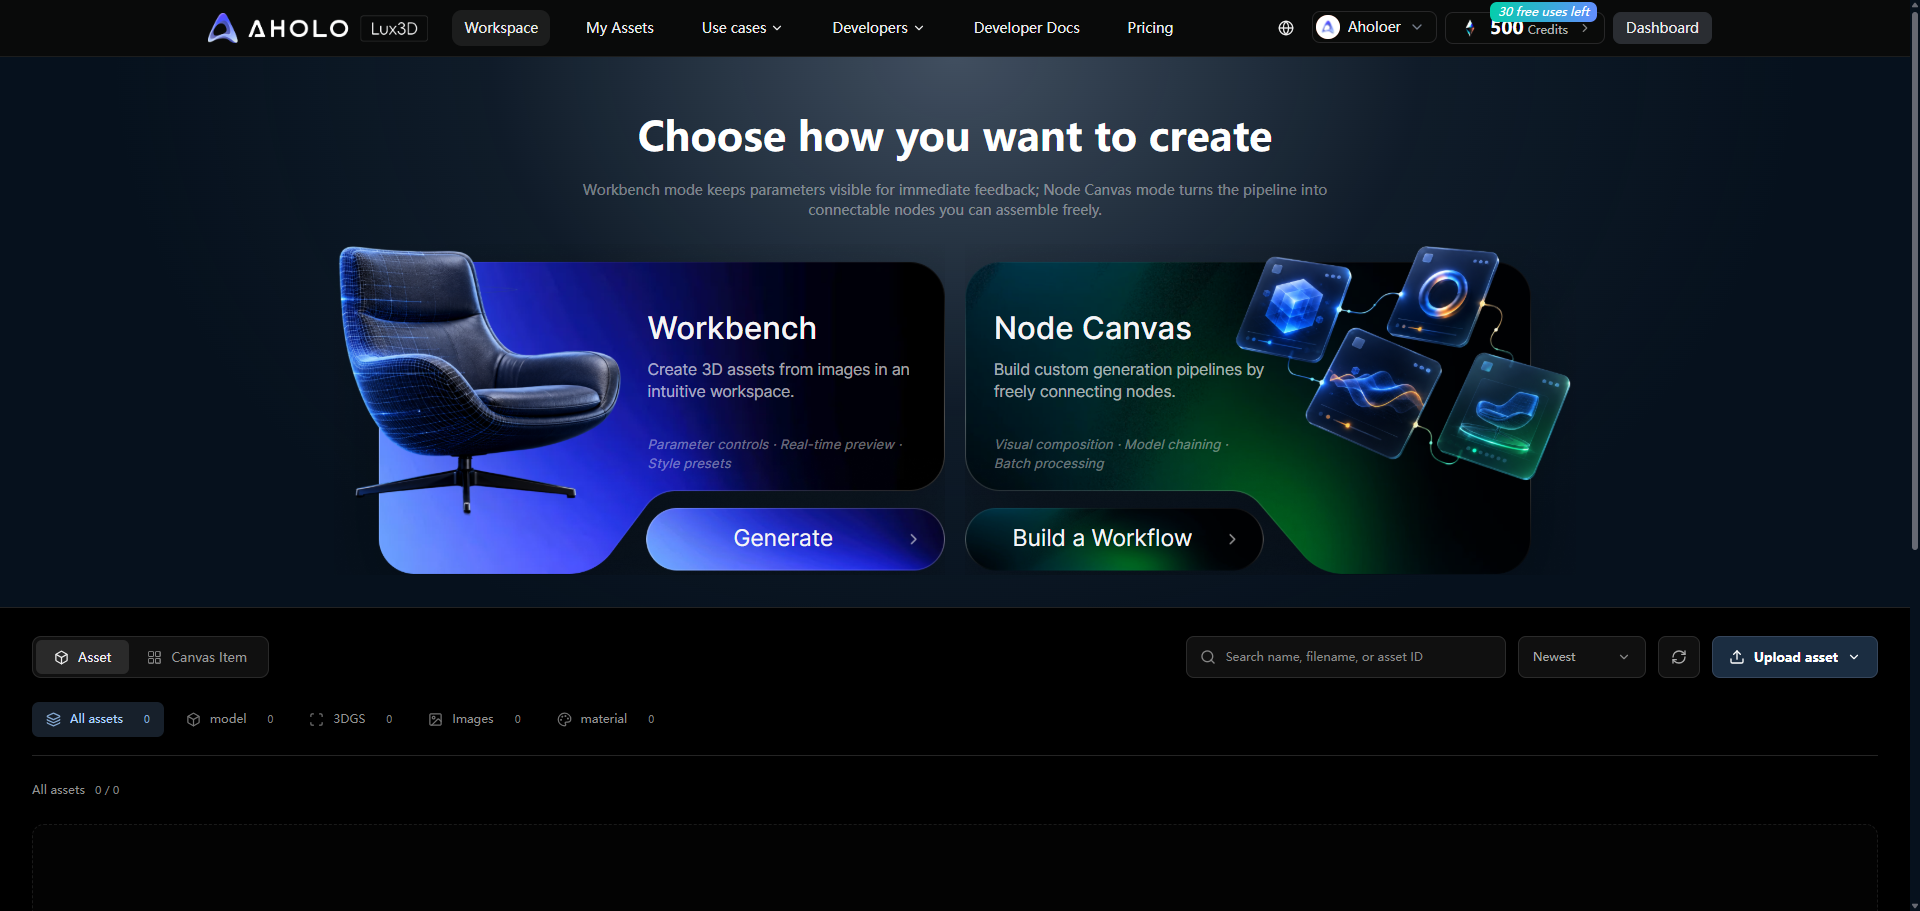
After entering the Creation Space, choose "Lite". You can create a new task from the top and switch between the following modes:
Image-to-3D: Upload one image; after selecting G1, you can continue adding multiple view-angle images.
Text-to-3D: Enter a prompt and choose an image-generation style. The system first generates a reference image, then automatically runs 3D generation.
Material Repaint: Select or upload a target GLB model, then upload a material reference image.
Figure 2: Lite and Pro creation entries
2. Image-to-3D
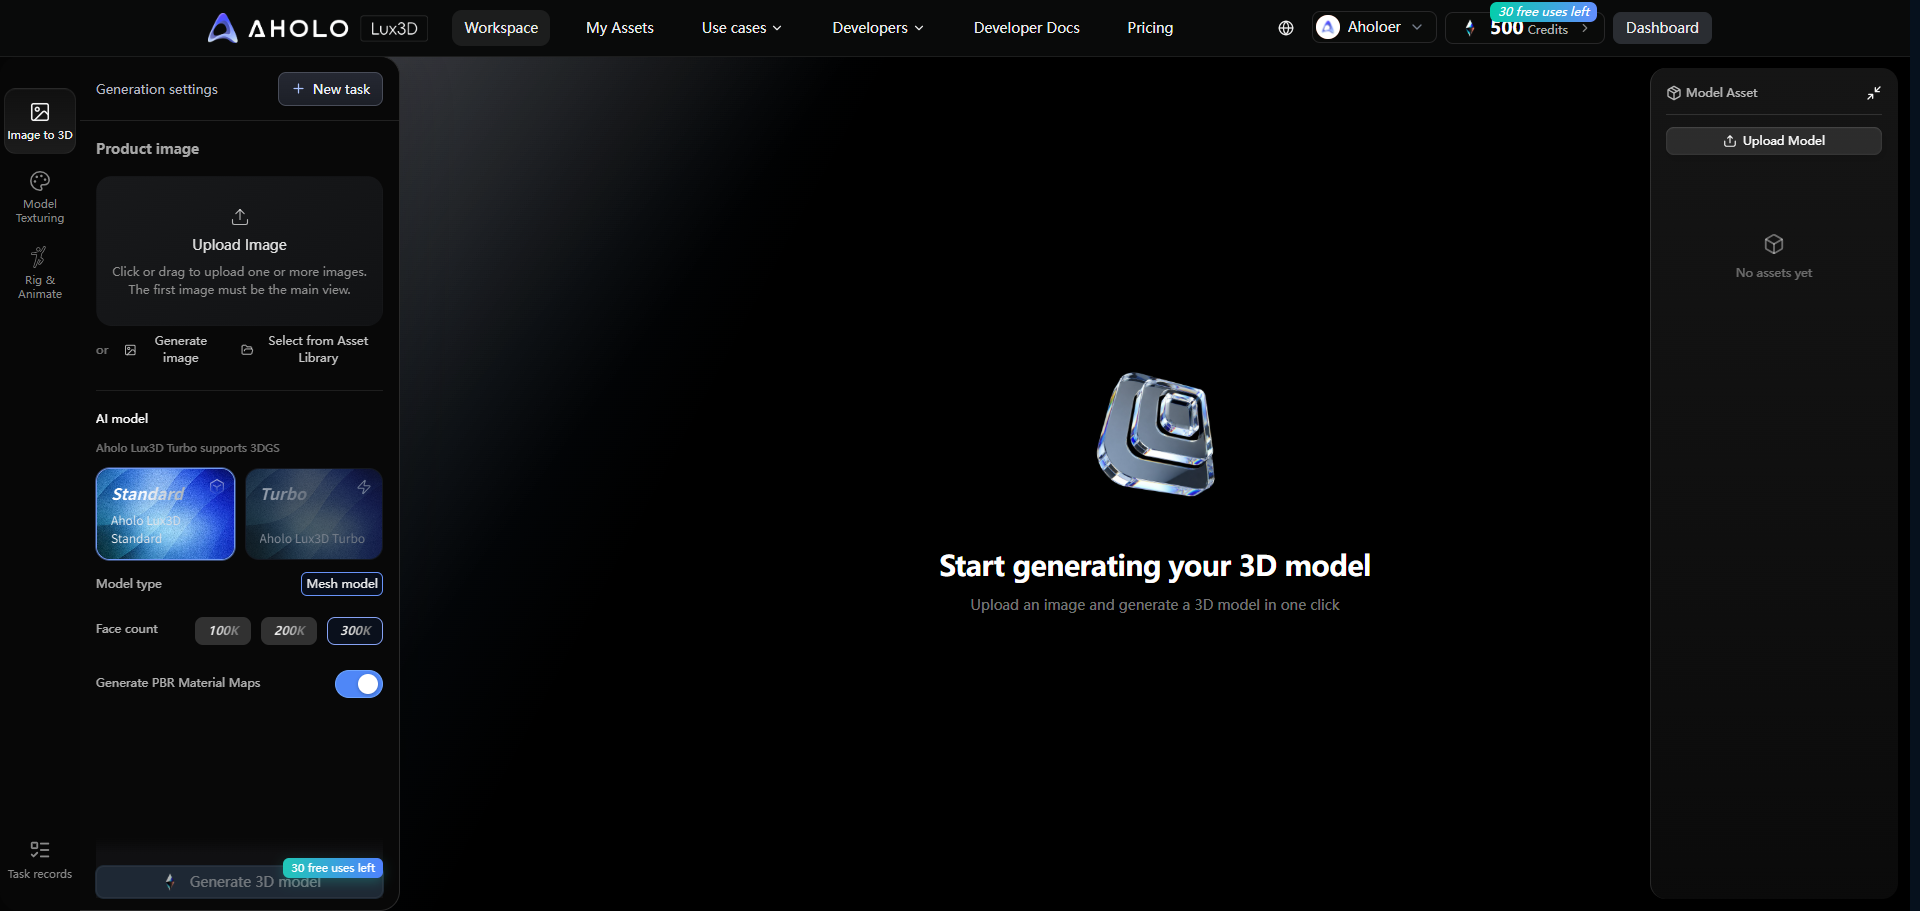
Select "Image-to-3D". Upload a PNG, JPG, or WEBP image.
In "AI Model", choose Lux3D 3.0, Lux3D-G1, or other models available in the current environment.
When G1 is selected, you can click "Add More Views" to continue uploading; submit only after all images have finished uploading.
Configure polygon count, size, and additional export formats according to the model's capabilities.
You may fill in a model name; if left blank, the system will name it automatically.
Confirm the estimated credits and click "Generate 3D Model".
Figure 3: Lite image-to-3D editing interface
3. Text-to-3D
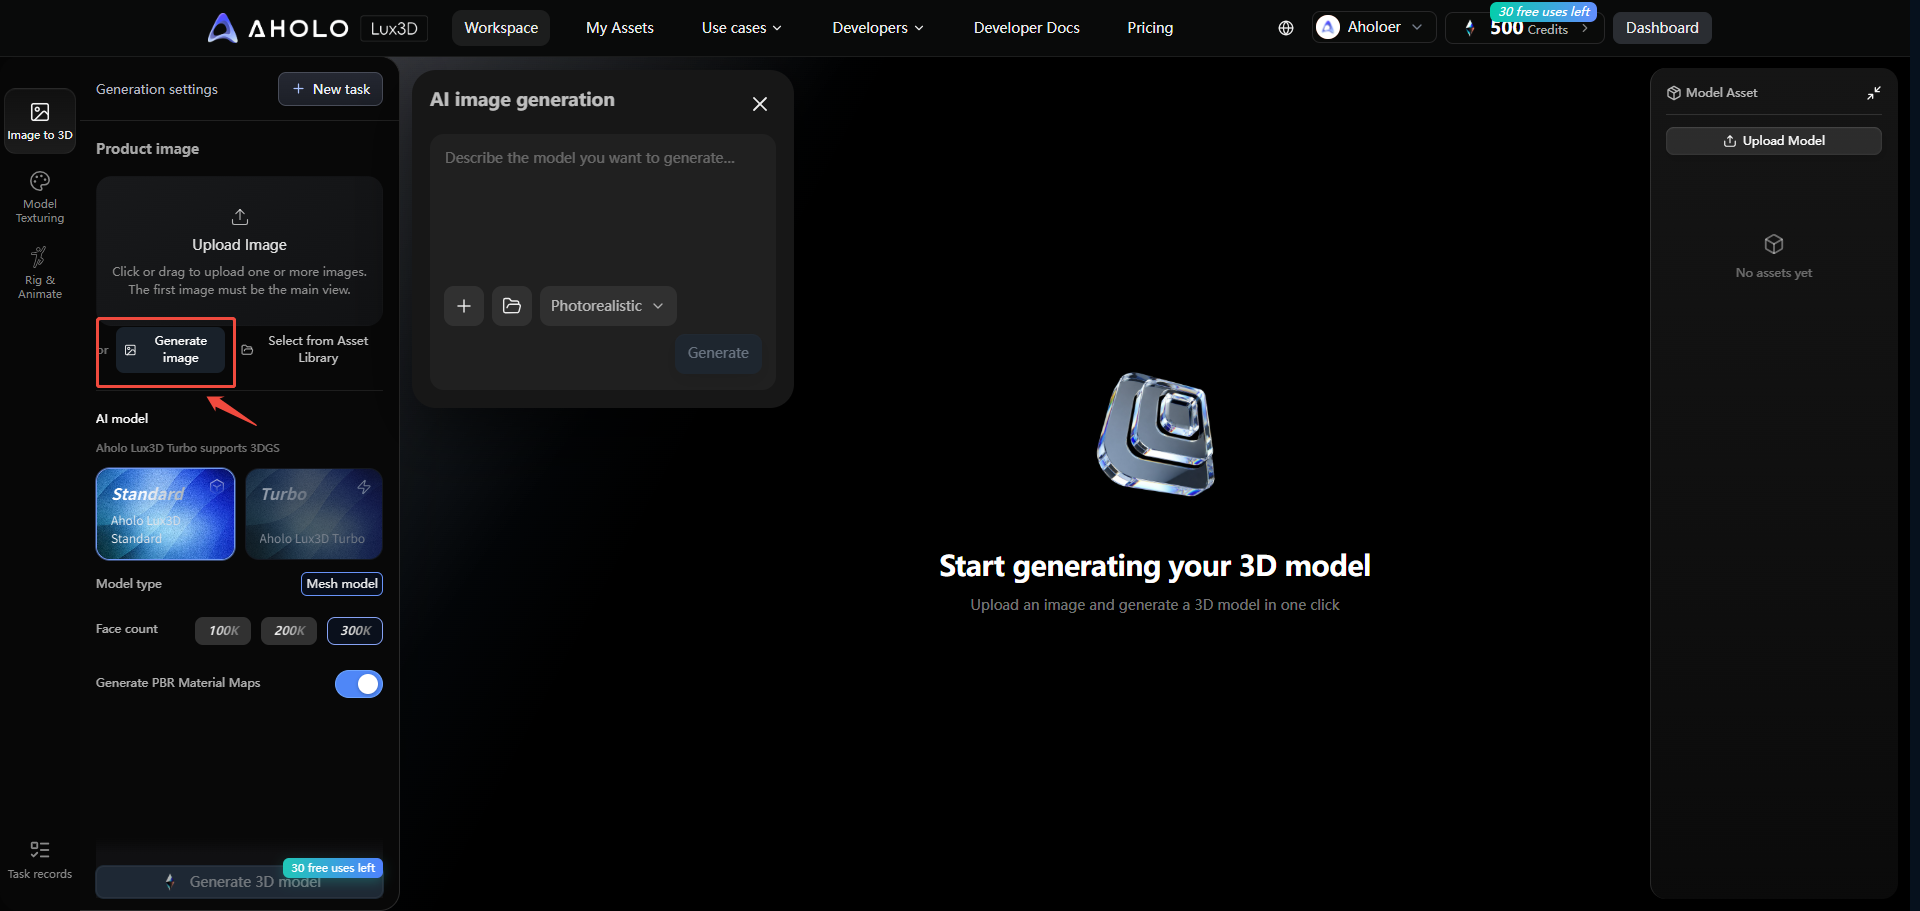
Select "Text-to-3D", and enter the target object, shape, material, color, and style.
Select an image-generation style; if no style is loaded or selected, you cannot submit.
The system first creates an image-generation task, then uses the generated image as the 3D input.
Once the reference image is ready, it automatically enters the 3D generation stage without requiring another submission.
Figure 4: Lite text-to-3D editing interface
4. Generation Settings
AI Model: Lux3D 3.0 is selected by default.
Geometry Quality: "Standard/Fine" is shown only for models that explicitly support fine mode; currently limited in code to Lux3D 1.0-pro.
Polygon Count: Lux3D 3.0 offers 30k, 60k, and 100k by default, with 60k selected; the server can override the tier.
Target Size: Choose AI-predicted, or a custom positive height. If the custom height is invalid, submission is blocked.
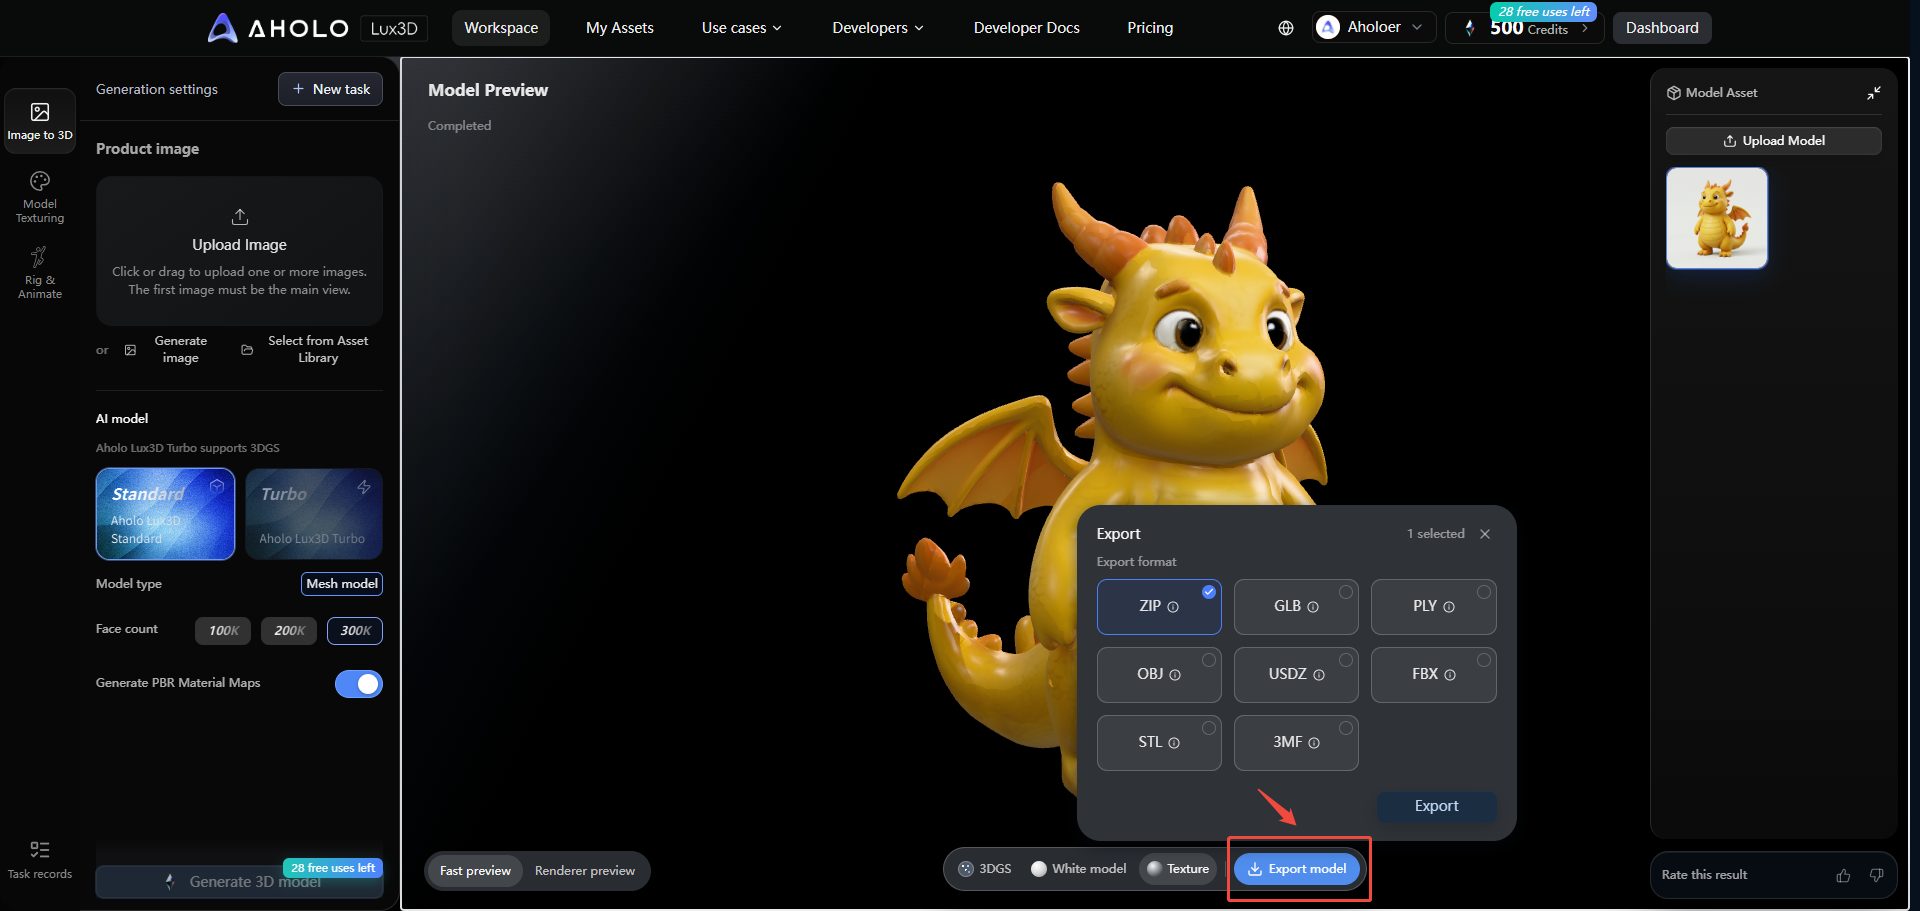
Export Format: Supports GLB, OBJ, FBX, USDZ, ZIP, PLY, and other result formats; the actual options are determined by the task's returned artifacts. For the 3.0 pipeline that supports optional formats, ZIP/GLB are base outputs, while USDZ, OBJ, and FBX can be selected on the page; FBX will increase generation time.
Figure 5: Model selection menu
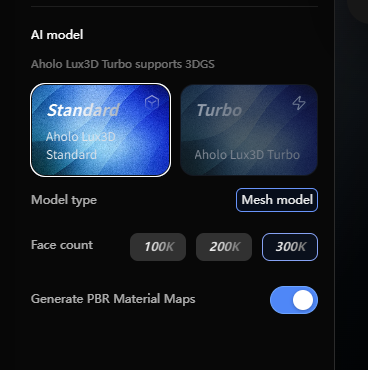
Figure 6: Polygon count, size, and additional export format settings
5. Task Status and History
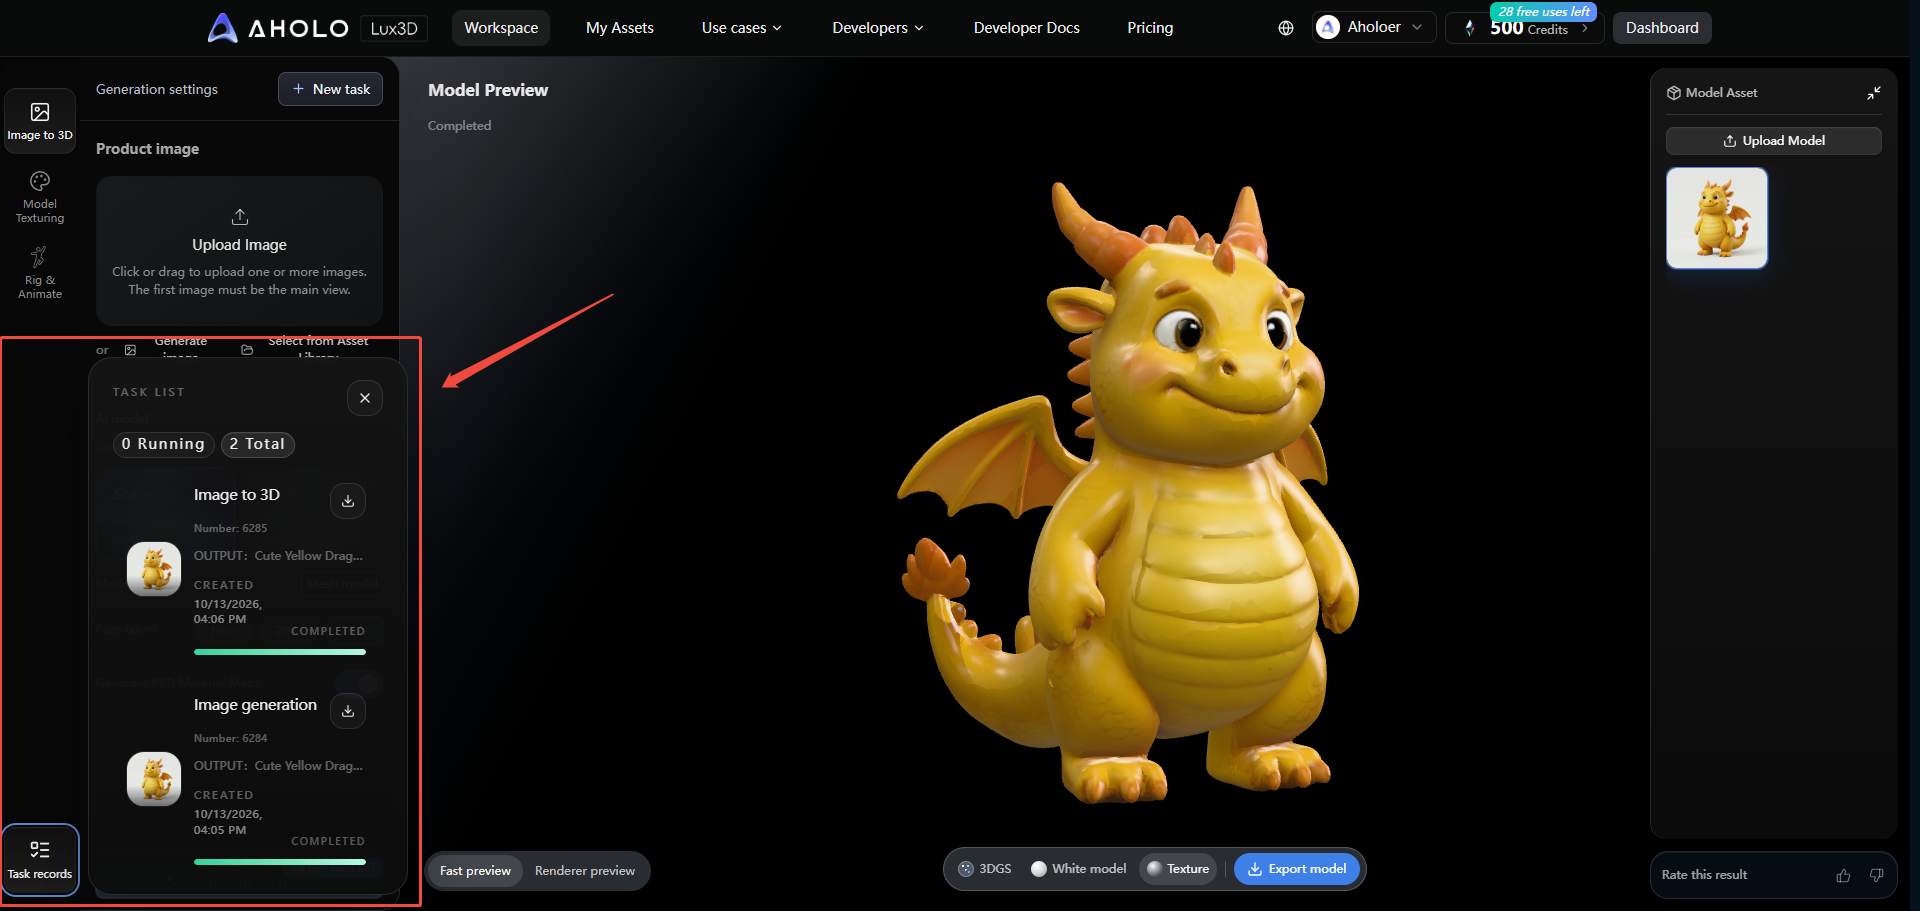
Tasks will sequentially show as queued, running, succeeded, or failed. The task panel supports viewing history, switching the current task, loading more records, and saving successful results to the asset library. Concurrency is determined by the page configuration; when the limit is reached, wait for running tasks to complete.
Figure 7: Task records and result preview
6. Preview and Export
After a task completes, the result area loads the available artifacts. Standard meshes can be previewed using local GLB/GLTF/ZIP preview or LuxReal; G1's 3DGS artifacts can be previewed via Gaussian Splat. The export dropdown only shows formats that are ready; OBJ and FBX downloads are packaged as ZIP.
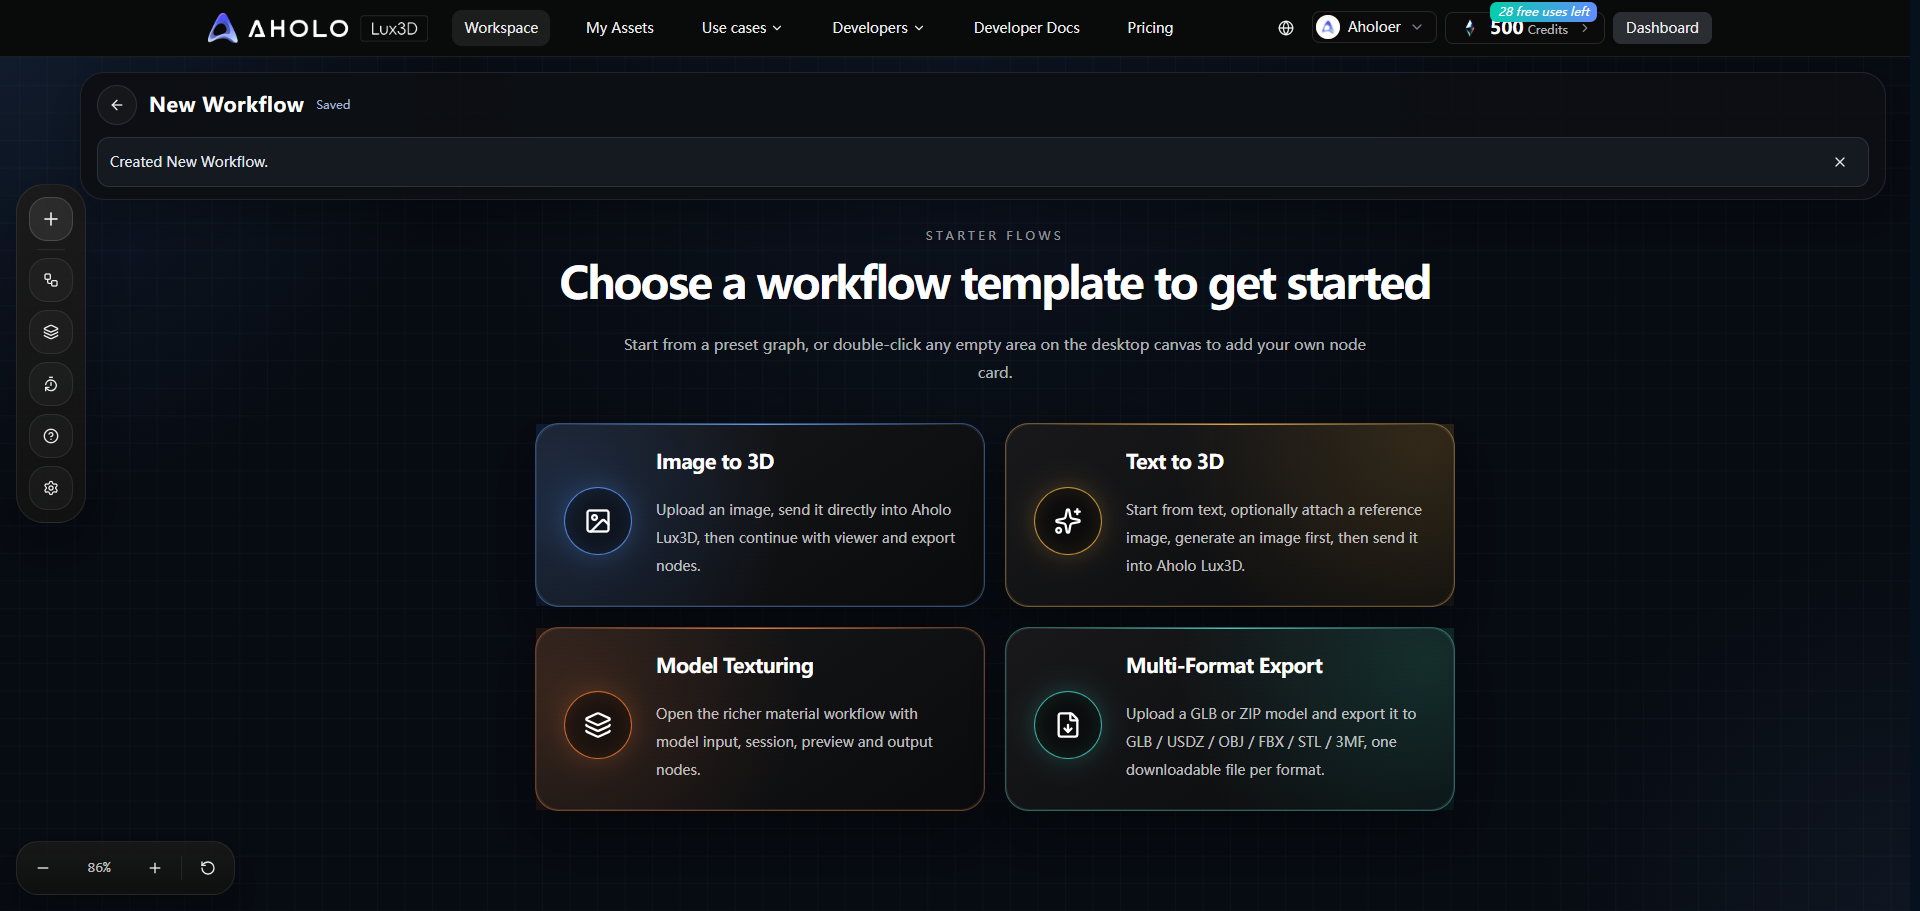
Creation Space: Pro Workflow
1. Starting Workflows
Image-to-3D: Image input → Lux3D generation → preview → export.
Text-to-3D: Text → image generation → Lux3D generation → preview → export.
GLB Preview: Upload GLB → local preview or LuxReal.
Material Repaint: Target model + material reference image → Lux3D material repaint → preview/export.
Custom Workflow: Add nodes as needed from a blank canvas.
Figure 8: Pro workflow homepage
2. Add, Connect, and Delete Nodes
Double-click an empty area of the canvas or click "Add Node" to open the node library.
Drag from an upstream node's output port to a downstream node's input port to establish a connection.
Node inputs must satisfy type requirements; image, material, and model cannot connect to incompatible ports.
Select a node to delete it; related connections are removed at the same time.
The canvas supports zooming, panning, and multi-select; the zoom range is limited by the editor.
Figure 9: Pro node workflow canvas
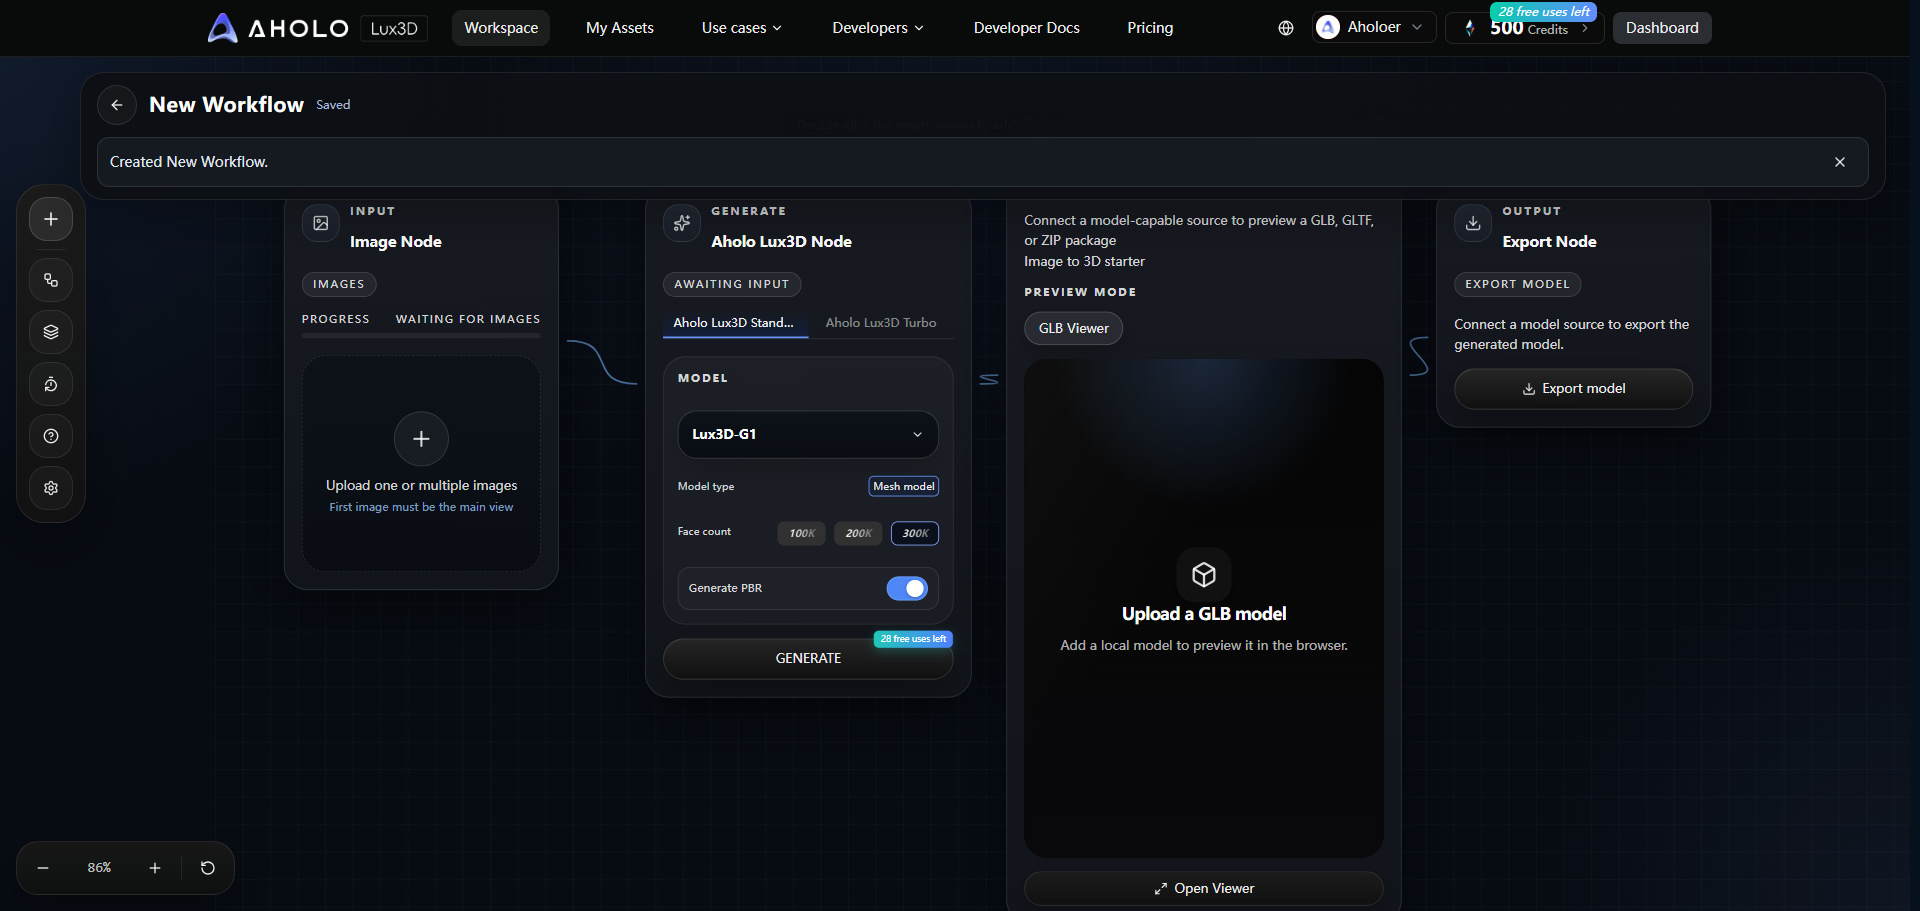
3. Lux3D Generation Node
The generation node reads the connected image, model, material, and model configuration. The current node API does not directly accept text prompts; the text-to-3D flow must first use an "Image Generation" node to convert text to an image. Standard generation accepts image input; material input must also have a target model connected, and cannot be mixed with a normal image input.
4. Using G1 in the Workflow
Connect an image node to the Lux3D generation node; after selecting Lux3D-G1, you can continue adding multiple images in the image node. Running will be blocked with a reason if you exceed the number allowed by the model, an image is still uploading, or the model has not enabled multi-image capabilities. G1 results can be switched to 3DGS preview mode.
5. API Key, Credits, and Running
Before running a generation node, select an available API key and confirm the input resources and model. The credit summary at the top shows the estimated consumption for the current workflow; G1 uses an independent fast-generation billing item, and actual deductions are subject to the page and usage records. After clicking Run, you can view progress and results in the "Task Queue".
6. Preview Nodes
Model Preview: Preview GLB, GLTF, or a ZIP that contains only one GLB.
LuxReal: Create a real-time session based on a registered model asset, a model URL, or a resource locator.
3DGS: Preview G1 Gaussian Splat artifacts.
7. Save and Manage Workflows
Workflows can be renamed, saved, and set as public or private. Reopening restores the nodes, connections, canvas, and editor state. When you open a result generated by a workflow from the asset library, you can return to the corresponding workflow to continue editing.
Was this helpful?
Still need help? Ask the team